Teaching children about carbon dioxide (CO2) can be a fun and educational experience. By engaging them with hands-on experiments, they’ll understand how CO2 works and why it’s important. Here are some simple and enjoyable CO2 projects you can try with your kids.
1. Baking Soda and Vinegar Reaction
This classic experiment demonstrates how CO2 is released during chemical reactions. You’ll need:
- Baking soda
- Vinegar
- Balloon
- Plastic bottle
Steps:
- Pour a small amount of vinegar into a plastic bottle.
- Fill a balloon with baking soda.
- Secure the balloon over the bottle’s mouth without letting the baking soda fall into the vinegar.
- Lift the balloon, allowing the baking soda to fall into the bottle, triggering a reaction that will inflate the balloon.
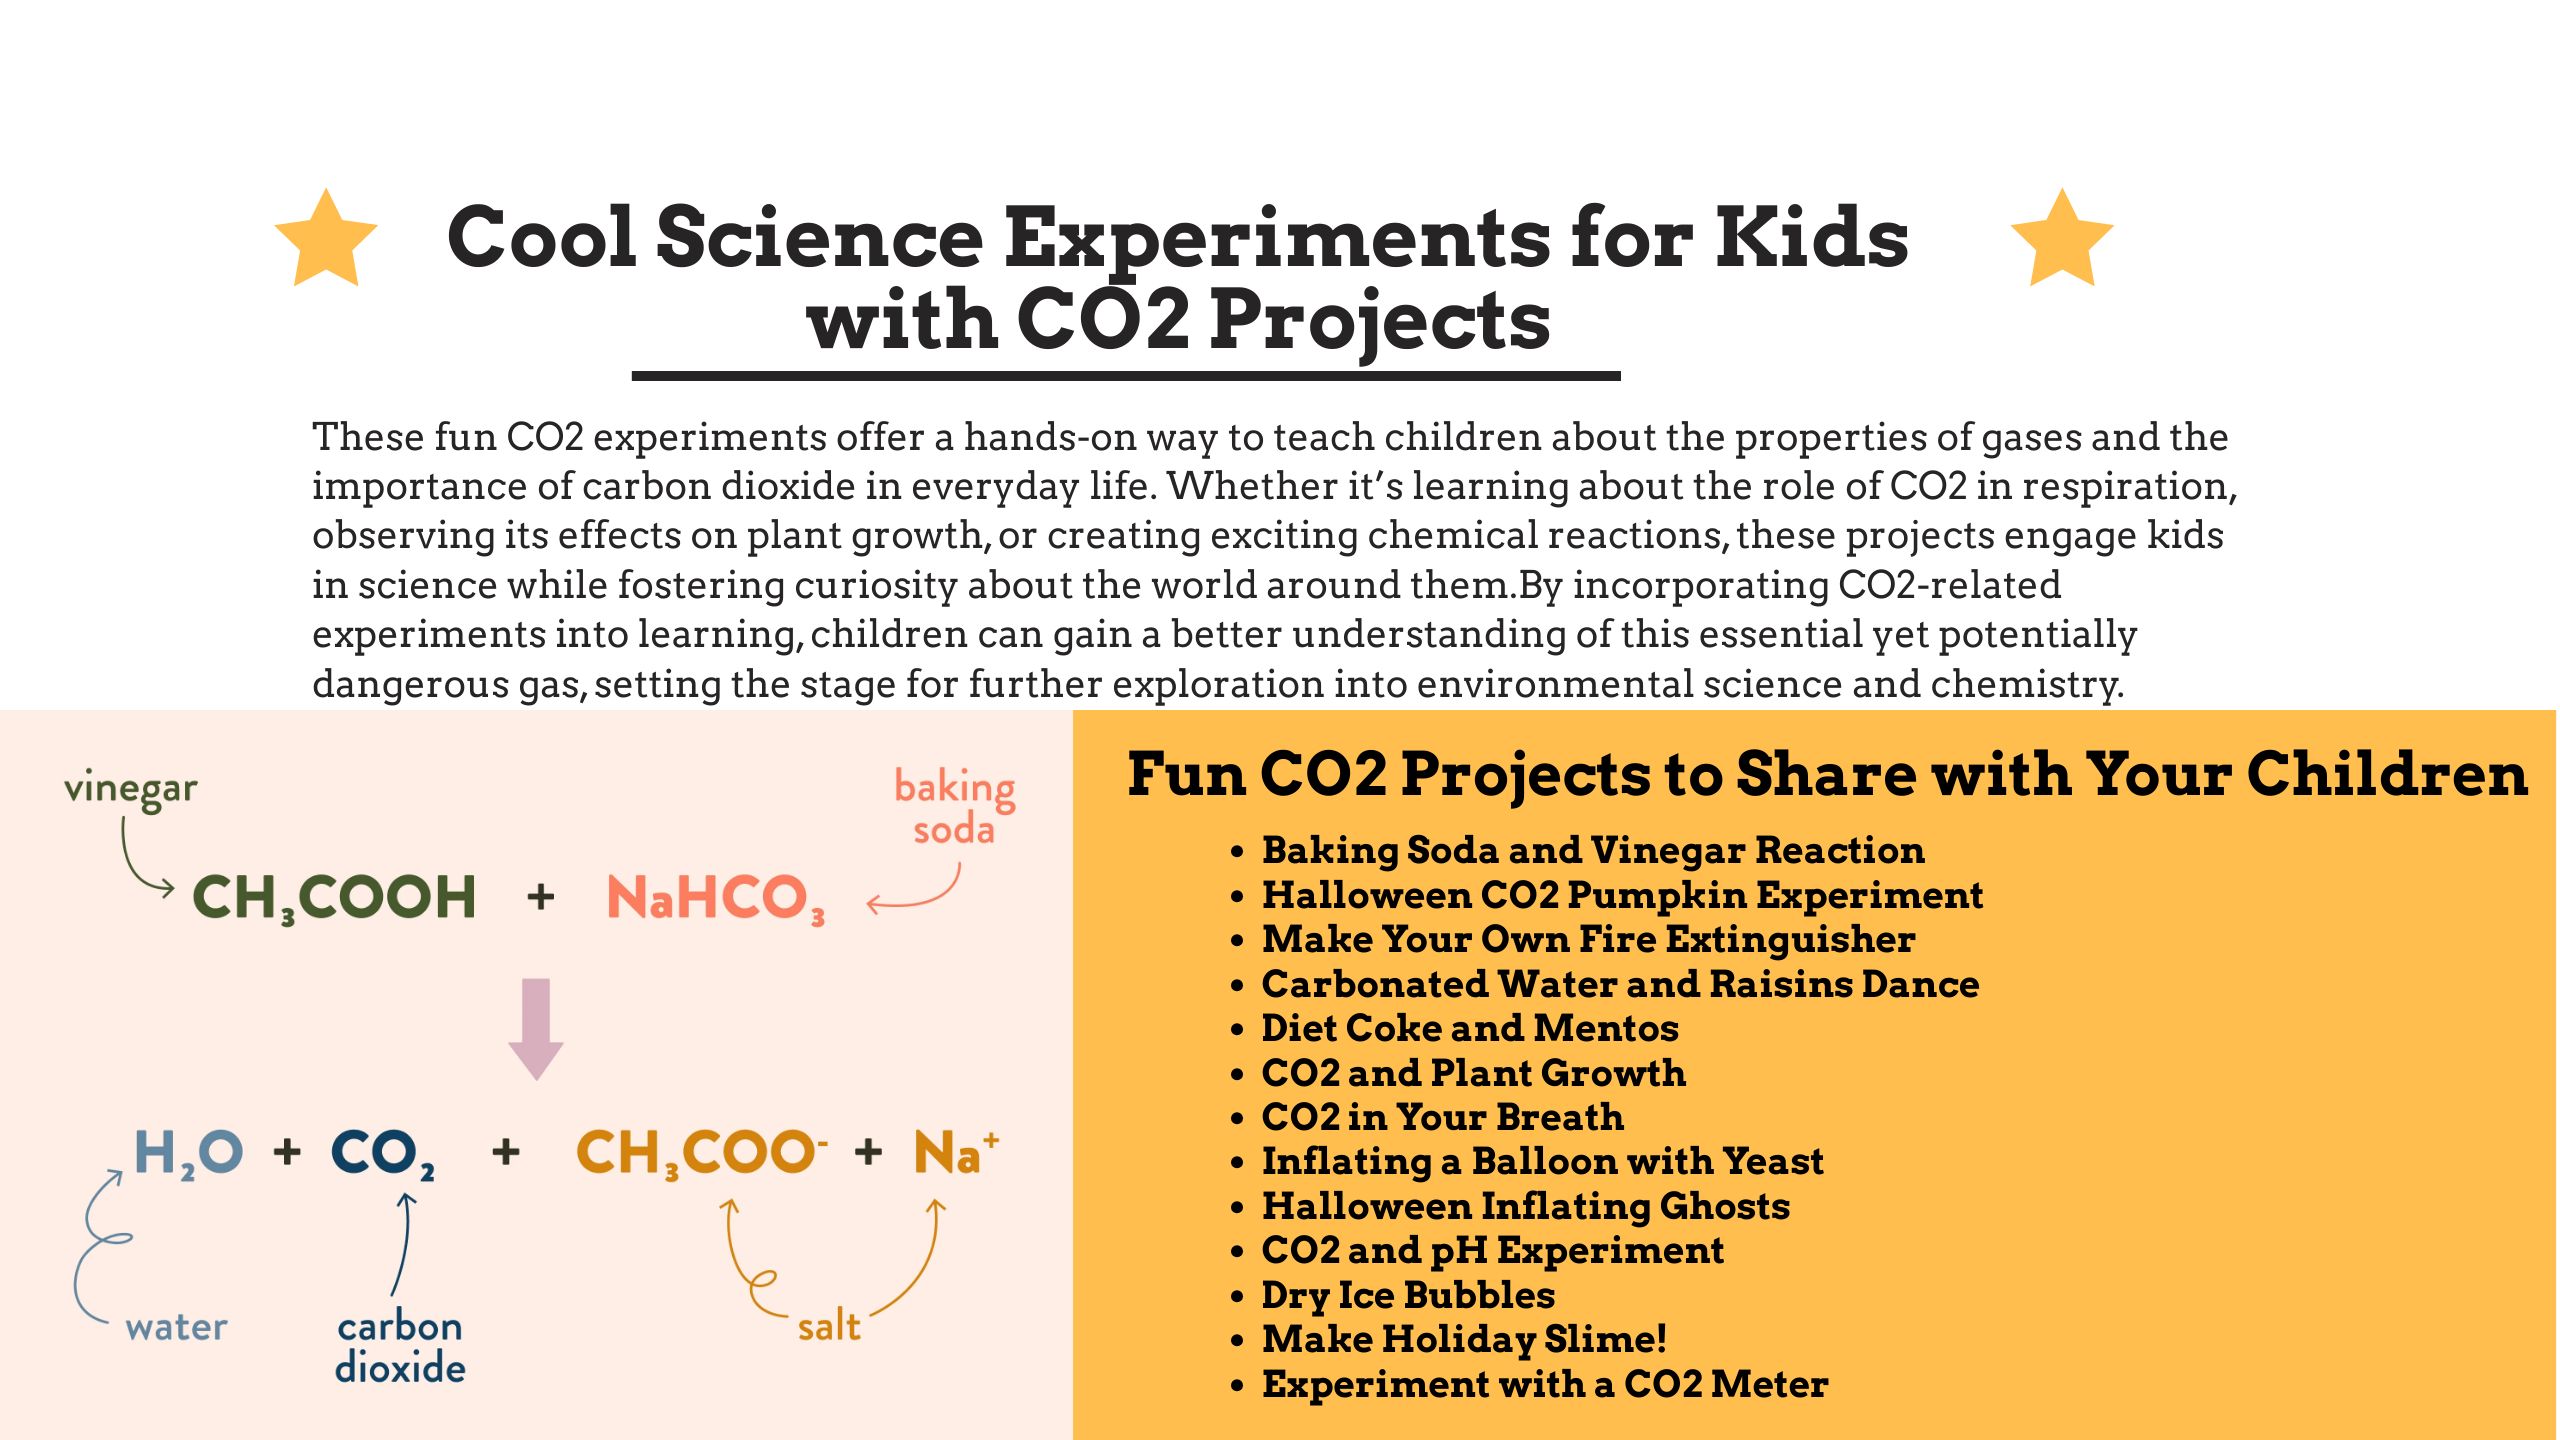
Explanation: When baking soda (sodium bicarbonate) reacts with vinegar (acetic acid), it produces CO2 gas, inflating the balloon. This fun project shows how CO2 is a product of chemical reactions.
Case:
Halloween CO2 Pumpkin Experiment
The Halloween CO2 Pumpkin Experiment is a fun and spooky way to demonstrate the power of a CO2 reaction. Here’s how it works:
Materials:
- A hollowed-out pumpkin
- Baking soda
- Vinegar
- Dish soap
- Food coloring (optional)
Steps:
- Place some baking soda inside the pumpkin.
- Pour vinegar mixed with dish soap and food coloring into the pumpkin.
- Watch as the reaction causes a bubbly, foamy eruption—like the pumpkin is “vomiting.”
Science Behind It: The baking soda (a base) reacts with vinegar (an acid), releasing carbon dioxide gas. This is the same principle behind many CO2-based reactions but with a Halloween twist!
2. Make Your Own Fire Extinguisher
CO2 is commonly used in fire extinguishers because it can displace oxygen, smothering flames. You can demonstrate this principle with a simple home experiment.
Materials:
- Candle
- Baking soda
- Vinegar
- Small cup or jar
Steps:
- Light the candle.
- In a separate cup, mix baking soda and vinegar to produce CO2 (similar to the balloon experiment).
- Carefully “pour” the gas from the cup over the flame without spilling the liquid.
Explanation: CO2 gas is heavier than air, so you can pour it like a liquid. As the CO2 displaces the oxygen around the candle flame, the fire goes out. This experiment teaches kids how CO2 can be used in real-world applications like firefighting.
3. Carbonated Water and Raisins Dance
This project uses CO2 already present in carbonated drinks to show gas in action.
Materials:
- Carbonated water or soda
- Raisins
- Clear glass
Steps:
- Fill a glass with carbonated water or soda.
- Drop a few raisins into the glass.
- Watch as the raisins “dance” up and down in the liquid.
Explanation: The bubbles in carbonated water are CO2 gas. As CO2 bubbles attach to the raisins, they become buoyant and rise to the surface. When the bubbles pop, the raisins sink back down. This fun activity helps kids visualize how gases interact with liquids.
Case:
Diet Coke and Mentos
This classic experiment uses CO2 from carbonated beverages to create an explosive reaction.
Materials:
- A bottle of Diet Coke
- A roll of Mentos candies
Steps:
- Open the Diet Coke bottle.
- Drop an entire roll of Mentos into the bottle quickly.
- Stand back and watch as the soda erupts like a geyser.
Why it Works: The surface of the Mentos candy has tiny pores that break the surface tension of the soda, allowing CO2 to escape rapidly. This creates a high-powered reaction, sending the soda shooting into the air.
4. CO2 and Plant Growth
Plants absorb CO2 during photosynthesis, so you can conduct a simple experiment to show the effects of CO2 on plant growth.
Materials:
- Two identical plants
- Clear plastic bags
- Water
- Baking soda
- Vinegar
Steps:
- Place each plant in a clear plastic bag. Water them as usual.
- In one bag, place a small cup containing baking soda and vinegar to produce CO2. Seal the bag.
- Leave the other plant as the control (without CO2).
- After a week, compare the growth of the two plants.
Explanation: This experiment shows how CO2 affects plant growth. Plants use CO2 for photosynthesis, so the plant exposed to additional CO2 may grow faster or larger than the control.
Related Read: The Benefits of CO2 for Plants: A Comprehensive Guide
5. CO2 in Your Breath
Kids can explore the presence of CO2 in their breath using a simple limewater test.
Materials:
- Limewater (available from chemistry suppliers or made by mixing calcium hydroxide with water)
- Straw
- Clear container
Steps:
- Fill a clear container with limewater.
- Have your child blow through a straw into the limewater.
- Observe any changes in the water.
Explanation: When you exhale, you release CO2. The CO2 reacts with the limewater, causing it to turn cloudy. This activity helps kids see how CO2 is a natural byproduct of respiration.
6. Inflating a Balloon with Yeast
This experiment demonstrates how CO2 is produced during fermentation.
Materials:
- Yeast
- Sugar
- Warm water
- Balloon
- Plastic bottle
Steps:
- Add a teaspoon of yeast and a teaspoon of sugar to a plastic bottle.
- Pour in warm water, and stir the mixture.
- Place a balloon over the bottle’s mouth.
- Watch as the balloon slowly inflates over time.
Explanation: The yeast feeds on the sugar, producing CO2 as a byproduct of fermentation. This process shows how living organisms generate CO2, particularly in baking and brewing.
Case:
Halloween Inflating Ghosts
Create spooky, self-inflating ghosts using simple ingredients:
Materials:
- Balloons (white)
- Baking soda
- Vinegar
- Black marker
- Plastic bottle
Steps:
- Draw ghost faces on the white balloons.
- Fill the balloons with baking soda.
- Pour vinegar into the plastic bottle.
- Secure the balloon over the bottle’s opening and let the baking soda fall into the vinegar.
The reaction between the baking soda and vinegar produces CO2, inflating the ghost balloons and giving them a life of their own.
7. CO2 and pH Experiment
CO2 can change the acidity of liquids. In this experiment, kids can observe how CO2 from their breath can affect the pH of water.
Materials:
- pH indicator (like red cabbage juice or a pH strip)
- Water
- Straw
Steps:
- Fill a glass with water.
- Add a few drops of pH indicator to the water (or test the pH with a strip).
- Have your child blow into the water through a straw for a few minutes.
- Test the pH again after blowing.
Explanation: CO2 reacts with water to form carbonic acid, lowering the pH. This experiment helps kids understand how CO2 can influence water chemistry, which is important in fields like oceanography.
8. Dry Ice Bubbles
Dry ice is solid CO2, and it can be used to make an exciting bubble experiment.
Materials:
- Dry ice (handle with gloves)
- Soap solution
- Large container
- Warm water
Steps:
- Carefully place a chunk of dry ice in a container of warm water.
- Dip a cloth in the soap solution and run it along the edge of the container, creating a soap film over the top.
- Watch as the soap film stretches into a giant bubble filled with CO2.
Explanation: As the dry ice sublimates (turns directly from solid to gas), it releases CO2, inflating the bubble. This experiment is visually spectacular and demonstrates the properties of CO2 in its solid state.
Related Read: Dry Ice: Dangers, Uses, and Safety Best Practices
9. Make Holiday Slime!
Incorporate CO2 into holiday-themed slime for some extra fun.
Materials:
- White glue
- Baking soda
- Vinegar
- Food coloring
- Cornstarch
Steps:
- Mix glue, baking soda, and food coloring in a bowl.
- Slowly add vinegar, stirring constantly.
- Once the mixture starts to bubble, add cornstarch until the slime reaches the desired consistency.
Why it Works: The baking soda and vinegar reaction produces CO2 bubbles, making the slime slightly bubbly and fizzy. This adds a fun texture to traditional slime while making the experiment interactive.
10. Experiment with a CO2 Meter
For older children, using a CO2 meter can be a great way to demonstrate the importance of air quality and how carbon dioxide levels change based on activity.
Materials:
- CO2 meter
- Indoor space
- Timer
Steps:
- Set the CO2 meter in a well-ventilated room and record the baseline reading.
- Have several people enter the room and remain still, observing how the CO2 levels increase due to breathing.
- Test how opening a window or turning on a fan reduces CO2 levels over time.
Lesson: This experiment shows how human activity impacts indoor air quality and teaches kids the importance of ventilation. It’s a practical lesson that can lead to conversations about environmental science and health.
Conclusion
These fun CO2 experiments offer a hands-on way to teach children about the properties of gases and the importance of carbon dioxide in everyday life. Whether it’s learning about the role of CO2 in respiration, observing its effects on plant growth, or creating exciting chemical reactions, these projects engage kids in science while fostering curiosity about the world around them.
By incorporating CO2-related experiments into learning, children can gain a better understanding of this essential yet potentially dangerous gas, setting the stage for further exploration into environmental science and chemistry.